Home
Home
Services
Services
Resources
Resources
Storm Restoration
Storm Restoration
Roof Systems
Roof Systems
Locations
Locations
Get practical shingle roof repair tips for homeowners. Learn how to spot damage, make safe repairs, and know when to call a professional for your roof.

After a Houston storm passes, a walk around your property can reveal unwelcome surprises, like a stray shingle on your lawn. While your first instinct might be to fix it quickly, a successful repair starts with understanding the full scope of the problem. This article serves as your guide to making an informed decision, not a rushed one. We’ll provide practical shingle roof repair tips that empower you to identify common types of damage, gather the right tools, and prioritize your safety above all else. Our goal is to give you the clarity needed to distinguish between a manageable DIY task and a situation that requires an expert eye.
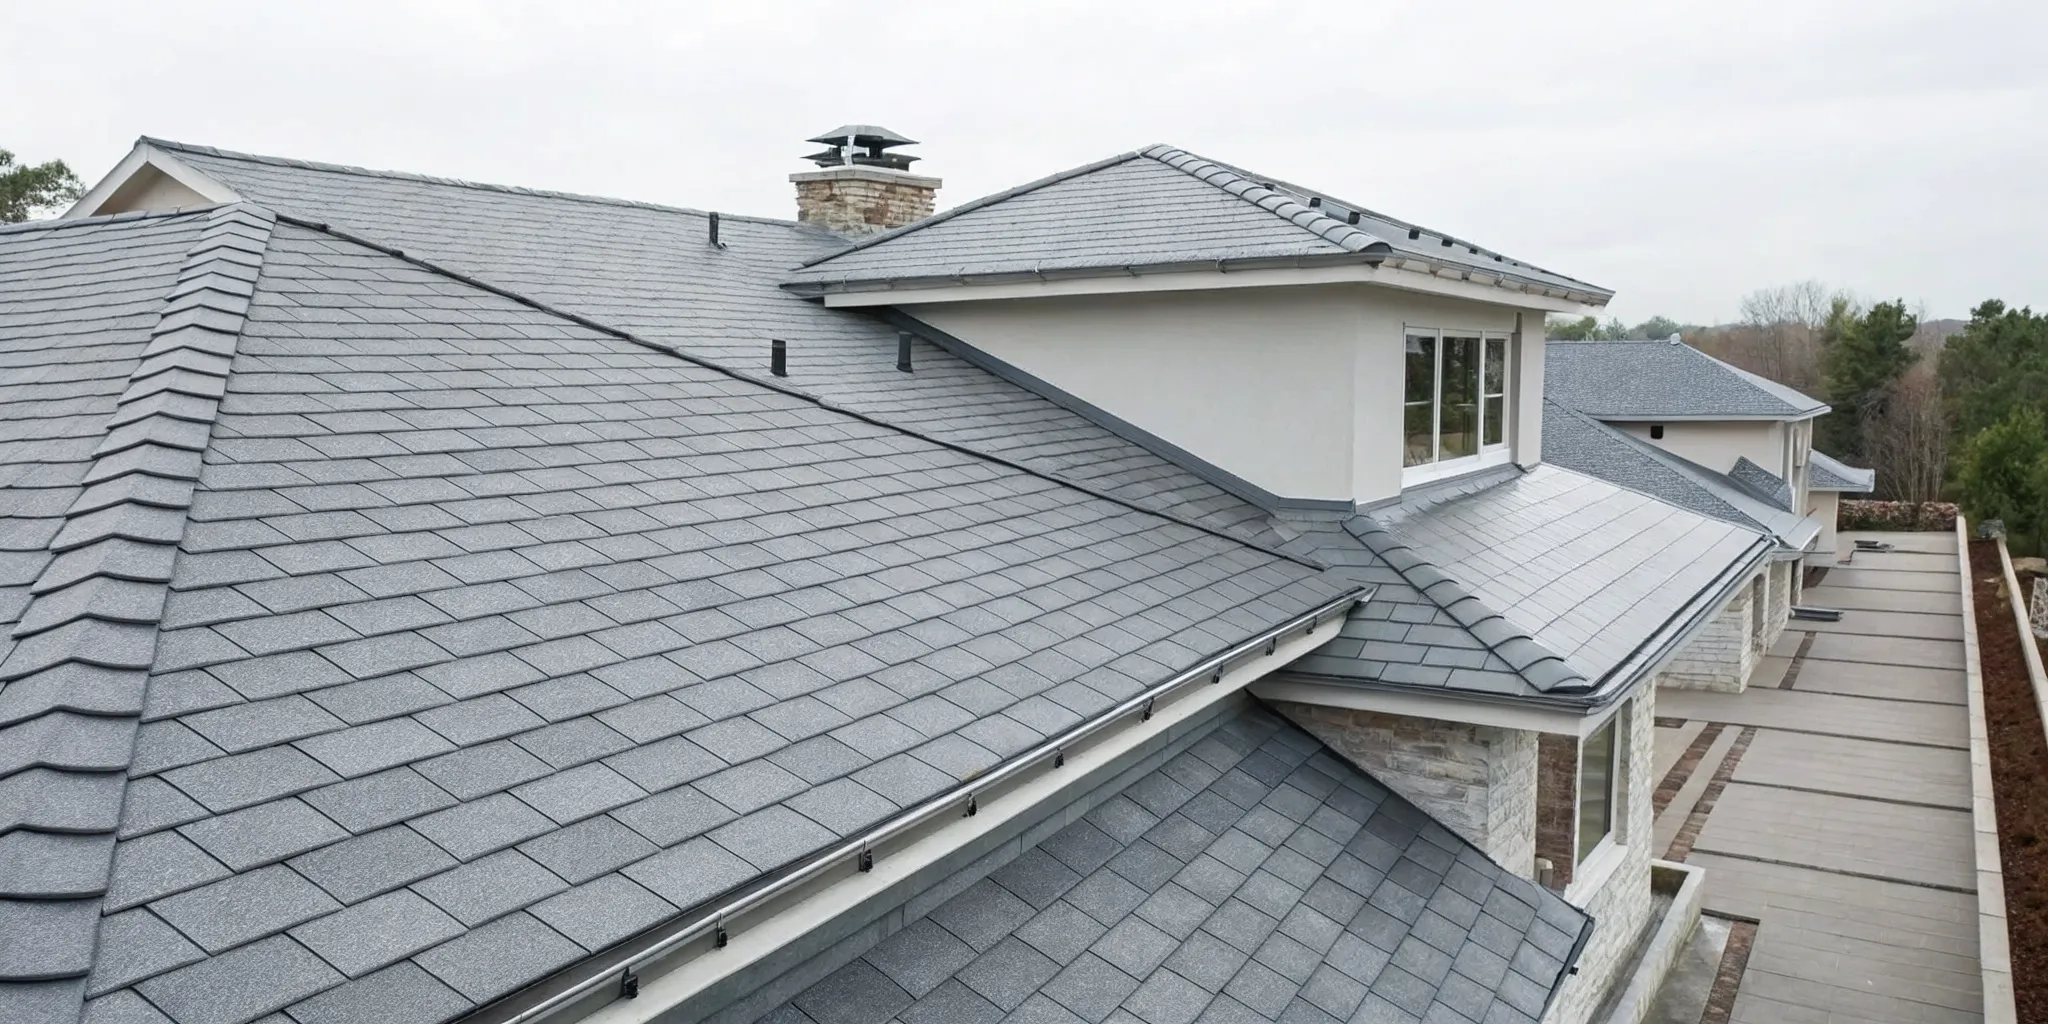
Knowing what to look for is the first step toward protecting your home and making informed decisions about your roof. Many of the most common signs of shingle damage are visible from the ground, allowing you to stay ahead of potential problems without ever stepping on a ladder. Think of this as your initial assessment; it helps you gather the facts so you know when it’s time to call for a professional inspection. Spotting these issues early can prevent a small, fixable problem from turning into a costly headache. These clues give you the power to act proactively, ensuring your home remains secure and your investment is protected.
A missing shingle is one of the most obvious signs of roof damage. After a significant Houston storm, take a walk around your property and look up. You’re searching for gaps or off-color patches where a shingle has been torn away by wind or impact. While it might seem like a small issue, even one missing shingle exposes the underlying materials to rain, sun, and humidity. This breach in your roof's protective layer is a direct entry point for water, which can lead to rot and leaks over time. Addressing a missing shingle quickly is key to preventing more extensive and expensive repairs down the road.
Not all damaged shingles fly off the roof; many show signs of stress while still in place. From the ground, you might notice shingles that are cracked, have upturned edges (curling), or appear wavy and distorted (buckling). Cracks are often caused by wind or hail and create a vulnerability for water to seep through. Curling edges are typically a sign of aging, as the shingle loses its flexibility. Buckling can point to bigger issues, like moisture trapped under the roof or improper installation. While a few cracked shingles might call for a simple repair, widespread curling or buckling often indicates your roof is nearing the end of its functional life.
When you clean your gutters, pay attention to what you find. If you see a collection of small, sand-like particles, you’re looking at shingle granules. These granules form the top layer of your asphalt shingles, protecting them from UV rays and harsh weather. A new roof will shed some excess granules, but if you consistently find large amounts in your gutters or at the bottom of your downspouts, it’s a red flag. Significant granule loss means your shingles are losing their primary layer of defense, becoming brittle and less effective at protecting your home from the elements.
Sometimes, the first sign of a roof problem appears inside your home. Keep an eye out for new water stains on your ceilings or walls, particularly on the top floor. These spots are often yellowish or brown and may feel damp or grow in size after it rains. You might also notice a persistent musty odor in your attic or upper rooms, which can signal hidden moisture. An interior stain means a leak has already breached all your roof's defenses and the insulation. It's crucial to act quickly, as unchecked moisture can lead to significant structural issues and mold growth.
Before you start any repair, a successful outcome begins on the ground. Gathering all your tools and materials ahead of time saves you from making multiple trips up and down a ladder, which is both inefficient and unsafe. Having the right equipment ensures you can handle the job correctly from the start, preventing a small issue from turning into a bigger, more expensive problem. Think of it like preparing a recipe: you wouldn't start cooking without having all the ingredients ready. A little preparation goes a long way in making your repair smooth, safe, and effective.
For most minor shingle repairs, you don’t need a truck full of equipment, but a few key items are non-negotiable. You’ll want a flat pry bar to gently lift the surrounding shingles without breaking them, a hammer for securing nails, and a sharp utility knife for trimming. A caulk gun is also essential for applying sealant precisely where it’s needed. Having these basic tools on hand makes the job much easier and helps you achieve a clean, durable fix. Trying to improvise with the wrong tools often leads to frustration and can cause more damage to your roof, so it’s worth getting the right gear together first.
Alongside your tools, you'll need the right supplies to perform the repair. The most important items are your replacement shingles and a tube of high-quality roofing sealant or cement. Roofing cement is excellent for securing a loose shingle corner or sealing a minor crack as a temporary fix to stop a leak. For permanent repairs, you will use it to seal the edges of your new shingle and cover the nail heads, creating a watertight barrier against rain. Always choose a sealant designed for exterior roofing applications; it’s formulated to withstand Houston’s intense sun and heavy storms. Don't forget to get roofing nails that are the correct length for your shingles.
Nothing stands out more than a mismatched patch on a roof. To avoid this, your goal is to find a replacement shingle that blends in seamlessly. The best way to do this is to take a piece of a damaged shingle with you to the hardware store. If that isn't possible, take several clear photos of your roof in good daylight. Pay close attention to the color, texture, and cut. Shingles fade over time due to sun exposure, so finding a perfect match can be tricky, but getting close is key for curb appeal. Understanding the different types of asphalt shingles can also help you identify what you have, making your search much easier.
Getting on your roof for even a minor repair is a serious task that demands your full attention. Before you even think about grabbing a ladder, it’s essential to run through a mental safety checklist. These steps aren’t about slowing you down; they’re about ensuring you can complete the job correctly and get back on the ground without incident. For homeowners who value making smart, informed decisions, prioritizing safety is the first and most critical step of any successful DIY repair.
The right gear is non-negotiable for roof work. Start with your footwear: soft-soled boots or shoes with excellent grip are essential for maintaining traction on shingle surfaces. Never wear slick-soled shoes or open-toed sandals. A good pair of work gloves will protect your hands from abrasive shingle granules and sharp tools. Safety glasses are also a must to shield your eyes from flying debris or roofing cement. For any roof with a noticeable pitch, a personal fall arrest system (PFAS), which includes a harness and anchor, is the professional standard. While it may seem like overkill for a small job, it’s the single best way to prevent a life-altering fall.
Your repair schedule should be dictated by the weather, especially here in Houston. Never attempt to work on a wet roof. Even a small amount of morning dew can make shingles dangerously slick. Wait until the sun has completely dried the surface. High winds are another major hazard, as a strong gust can easily make you lose your balance. Extreme heat also poses a risk; hot shingles can be difficult to handle, and the direct sun increases your risk of heatstroke. Plan your work for a clear, calm, and dry day, preferably during the cooler morning or late afternoon hours to avoid the worst of the Texas heat.
Proper ladder setup is fundamental to your safety. Place your extension ladder on firm, level ground, and follow the 4-to-1 rule: for every four feet of height you need to climb, move the base of the ladder one foot away from the wall. Make sure the ladder extends at least three feet above the roofline, giving you a stable handhold as you transition on and off the roof. If possible, secure the top of the ladder to the house itself. Before you climb, clear the area below of any tools, toys, or other obstacles, and ensure no one will be walking underneath while you work. A secure ladder setup is your foundation for a safe repair.
This is one of the most important rules of any DIY project that involves heights: always have a spotter. A second person on the ground is your first line of defense in an emergency. They can hold the base of the ladder steady, pass up tools you might have forgotten, and most importantly, call for help immediately if you fall or get into trouble. Working alone removes that critical safety net, turning a minor slip into a potentially severe situation. Before you start, make sure someone knows you’re on the roof and is available to assist. It’s a simple precaution that provides invaluable peace of mind and significantly reduces your risk.
Tackling a minor shingle repair yourself can be a satisfying project, but it requires the right approach. This guide walks you through the fundamental steps for replacing a single damaged shingle. Remember, this process is best for isolated issues on a roof that is otherwise in good condition. If you find widespread damage or feel unsure at any point, it’s always best to pause and consult a professional. For a confident homeowner with the right tools and a focus on safety, a small repair is a manageable task that can prevent a minor issue from becoming a major headache. Before you begin, read through all the steps to make sure you have a clear understanding of the entire process, from assessment to the final seal.
Before you grab your tools, take a moment to evaluate the situation from a safe vantage point, like the ground or a securely placed ladder. Look for obvious problems like missing, cracked, or curled shingles. You should also check your gutters for an accumulation of shingle granules, which look like coarse, dark sand and signal that your shingles are aging and losing their protective layer. A key factor is the age of your roof; if it's more than 20 years old, a single damaged shingle might be a symptom of a larger, systemic issue. As a general guideline, if more than a quarter of your roof shows damage, a full roof replacement is often more cost-effective than a series of repairs.
If you’ve noticed a water stain on your ceiling, your first instinct might be to look directly above it on the roof. However, the spot where water shows up inside your home is often not where the leak actually starts. Water is sneaky; it can enter through a compromised shingle and travel along rafters, decking, or vapor barriers before it finds a place to drip down. To find the real entry point, you may need to do some detective work in your attic. Look for wet insulation or water stains on the underside of the roof decking. Tracing the path upward from the interior stain will give you a much better idea of where the roof leak repair is actually needed on the exterior.
Once you've identified the culprit, the next step is to completely remove the damaged shingle without harming its neighbors. You will need a flat pry bar for this. Start by gently breaking the seal on the shingle directly above the damaged one; warm weather makes this easier. Once the seal is broken, you can see the nails holding the damaged shingle in place. Carefully slide your pry bar under the shingle and use it to pry up the nails. There will typically be four nails. Once the nails are out, the damaged shingle should slide out easily. Take your time during this step, as being too aggressive can crack the surrounding shingles and create more work for yourself.
With the old shingle removed, you're ready to install its replacement. Gently slide the new shingle into the empty space, making sure it aligns with the shingles on either side. It should slide under the shingle in the row above it, just like the one you removed. Once it’s positioned correctly, you’ll need to secure it. Using galvanized roofing nails, nail the new shingle in place. A good rule of thumb is to place four nails just below the shingle's tar strip, which is the adhesive line that helps it seal to the shingle above. This placement ensures the nails will be covered by the overlap of the next row of shingles, protecting them from the elements.
The final step is to seal your work to make it watertight. Apply a dab of roofing cement or sealant under the corners of the new shingle to help it adhere to the shingle below it. Next, you need to re-seal the shingle in the row above, which you lifted earlier. Gently lift its corners and apply a small amount of roofing sealant underneath to bond it to your new shingle. Press it down firmly. Be careful not to use too much sealant, as excess can look messy and may even trap water. This final seal is what protects your repair from wind and rain, ensuring it integrates seamlessly with the rest of your roof.
While it’s tempting to tackle a roof issue yourself, it’s critical to know which repairs are safe for a homeowner and which ones require a professional. Some minor, temporary fixes can prevent a small problem from getting worse, especially if you’re waiting for a roofer to arrive after a storm. However, attempting a repair beyond your skill level can lead to more extensive damage and serious safety risks. The goal of any DIY effort should be to provide a temporary stop-gap, not a permanent solution. Think of it as first aid for your roof. Before you decide to climb a ladder, be honest about your abilities and the scope of the problem. A smart repair strategy always starts with understanding your limits and prioritizing your safety above all else.
If you notice a single shingle with a minor crack or one that has come slightly loose, you can apply a small amount of roofing cement for a temporary hold. Use a caulk gun to apply the cement under the cracked or loose area, then press the shingle down firmly. You can also apply a dab of cement over any exposed nail heads to prevent water from seeping in. This is a quick, temporary measure to stop water intrusion until a proper professional inspection can determine the full extent of the issue. Remember, this is not a long-term fix and won't address underlying problems.
For a shingle that is badly cracked or has a corner missing, a replacement might be necessary. To do this, you’ll need to carefully lift the shingle directly above the damaged one to access the nails. Use a flat pry bar to gently remove the nails and slide the old shingle out. Slide the new shingle into place, secure it with galvanized roofing nails in the proper locations, and cover the nail heads with roofing cement. This task is best reserved for easily accessible, isolated damage on a low-sloped roof where you can work safely.
After a major storm, you might find a larger area of damage that needs immediate, temporary coverage to prevent water from pouring into your home. In this emergency scenario, you can use a heavy-duty tarp to cover the damaged section. Lay the tarp flat over the area, ensuring it extends several feet beyond the damage on all sides. Secure the edges with wooden planks or roofing nails to keep it in place until a professional can assess the roof. This is strictly an emergency measure to mitigate further damage while you wait for help.
Climbing on your roof is inherently dangerous, and many repairs should only be handled by trained and insured professionals. We strongly advise against homeowners getting on the roof to search for a leak’s source. Water can travel far from its entry point, making visual inspections from the surface unreliable and risky. Avoid any repairs involving extensive shingle replacement, flashing around chimneys or vents, or addressing potential structural issues. Your safety is paramount, and the complexity of a roofing system often means a small visible problem is a symptom of a much larger, hidden issue.
Tackling a home repair yourself can be incredibly satisfying, but when it comes to your roof, a small mistake can quickly turn into a major expense. A well-intentioned fix that doesn't address the root cause or uses the wrong technique can lead to persistent leaks, hidden water damage, and even structural issues. Understanding the common pitfalls of DIY roof repair helps you protect your home and make an informed decision about when to handle a task yourself and when it’s time to call for expert help. Avoiding these errors is key to ensuring a small problem doesn’t spiral into a costly crisis. We often see homeowners who, with the best intentions, accidentally make a problem worse. Before you climb that ladder, let's walk through the most frequent mistakes so you can approach your project with clarity and confidence, knowing exactly what to watch out for.
One of the most common DIY mistakes is assuming the water stain on your ceiling is directly below the leak's entry point on the roof. Leaks are tricky; water can enter through a compromised shingle, travel along a rafter or underneath the roof decking, and only appear inside your home several feet away. Patching the area above the interior stain without tracing the water’s path back to its origin is a temporary fix at best. This approach leaves the actual entry point open, allowing water to continue seeping in and potentially causing rot, mold, and damage to your roof’s structure. A true repair requires you to pinpoint the leak's source accurately.
While replacing a damaged shingle seems simple enough, using the wrong materials can compromise the repair. A shingle that doesn't match in color or style can hurt your home's curb appeal, but a functional mismatch is even worse. Shingles are designed to interlock and shed water in a specific way. Using a different brand or type can create gaps that invite water underneath. The same goes for sealants and nails. Using roofing cement that isn't rated for your climate or nails that are too short or rust-prone can cause the repair to fail within a single season, putting you right back where you started.
Your personal safety is more important than any home repair. Many homeowners underestimate the dangers of working on a roof. A fall can result in serious injury, and the risk increases on steeper pitches or in windy conditions. Beyond personal harm, you can also cause more damage to your roof by walking on it improperly, especially on a hot day when asphalt shingles are soft and easily scuffed. You can also crack tiles or dislodge granules, creating new problems while trying to fix an old one. Following proper roofing safety protocols is not optional; it’s an essential part of the job.
When you spot one cracked or missing shingle, it’s easy to develop tunnel vision and focus only on that single repair. However, that one damaged shingle is often a symptom of a larger issue. A DIY repair might miss widespread but subtle hail damage, multiple lifted or cracked shingles from wind, or significant granule loss across an entire roof plane. Fixing one spot while ignoring adjacent damage is an incomplete solution. A professional inspection is designed to assess the entire roofing system to ensure all areas of concern are identified, preventing you from having to get back on the ladder a few months later to fix another spot.
The shingles are your roof’s first line of defense, but the underlayment beneath them is the critical water-resistant barrier that protects the wooden roof deck. If a shingle is cracked, missing, or lifted for an extended period, it’s highly likely the underlayment below has also been exposed to the elements and is now damaged, brittle, or torn. Simply placing a new shingle over a compromised underlayment is like putting a bandage on a deep wound. It covers the problem but doesn't fix it. A lasting repair requires a full damage check that includes inspecting and repairing this hidden layer to ensure your roof is truly sealed against moisture.
While tackling a small shingle repair can be satisfying, knowing when to step back and call a professional is key to protecting your home. Certain situations require an expert eye and specialized equipment to diagnose and fix correctly. Think of it less as giving up on a DIY project and more as making a strategic decision to safeguard your property's biggest asset. A professional roofer can identify underlying issues that are not visible from the surface, preventing a small problem from turning into a costly structural failure.
Hiring an expert is especially important when the damage is complex or widespread. Professionals are trained to assess the entire roofing system, from the shingles and flashing down to the underlayment and decking. They can provide a complete picture of your roof’s health, which is essential for making informed decisions about repairs or replacement. This is particularly true after severe weather or when you notice signs of a persistent leak. Instead of guessing, a professional provides certainty.
If you notice damage across multiple areas of your roof, it’s time for a professional assessment. A common industry guideline suggests that if more than 25% of your roof is damaged, a full replacement is often more practical and cost-effective than patching numerous spots. Recurring leaks are another major red flag. If you’ve repaired a leak only for it to return, the true source is likely deeper than the shingle. A professional can trace the water path to its origin, ensuring the problem is fixed for good instead of just temporarily patched.
Some warning signs point to issues far more serious than a single damaged shingle. If you see a noticeable sag in your roofline, widespread water stains on your interior ceilings, or feel a spongy texture when walking on the roof, you may have a structural problem. These symptoms can indicate rot in the roof decking or damage to the rafters. A professional will check shingles, flashing, vents, and valleys to determine the extent of the issue. Attempting to fix this yourself is risky and can compromise your home’s integrity.
Houston weather can be unforgiving, and your roof often takes the brunt of it. After a major storm involving high winds, hail, or heavy rain, you should have your roof inspected by a professional. Getting on a potentially slick or unstable roof is dangerous, and you could accidentally make existing damage worse. Professionals are trained to spot subtle hail impacts or wind-lifted shingles that an untrained eye might miss. This hidden damage can create slow leaks that cause significant problems over time, so a thorough inspection is critical.
If you plan to file an insurance claim for roof damage, a professional inspection is not just helpful, it’s essential. Insurance companies require detailed documentation of the damage, its cause, and the scope of necessary repairs. A reputable roofing company can provide a comprehensive report with photos and data to support your claim, ensuring all damage is accounted for. While minor DIY fixes have their place, it's important to get expert advice to protect your roof's long-term health and simplify the claims process.
A little proactive care goes a long way in protecting your roof and preventing expensive repairs. By adopting a simple maintenance routine, you can catch small issues before they become major problems, extending the life of your home’s most important shield against the elements.
The best way to stay ahead of problems is to inspect your roof twice a year, in spring and fall. Look for lifted or cracked shingles and check flashing for peeling. A visual check from the ground is a good start, but a professional inspection provides a complete, data-driven picture of your roof’s health, helping you make informed decisions.
Your gutters are your roof's drainage system. When clogged, rainwater backs up under shingles, causing rot and leaks. Cleaning them once or twice a year is one of the most effective ways to prevent water damage. If you’re not comfortable on a ladder, hiring a service is a small investment that prevents much larger repair bills down the road.
Overhanging branches pose a direct threat. Falling limbs cause damage, while scraping branches wear away shingle granules. The shade also encourages moss and algae growth, which traps moisture. Regularly trimming back branches so they are a few feet from your roof is a crucial step in preventative care and protects your home from unnecessary harm.
The first sign of a leak is often hidden in your attic. After a heavy rain, safely check inside with a flashlight for dark stains on the roof decking or damp insulation. Catching moisture here helps you find a leak’s source before it damages your ceilings or walls. This quick check provides an essential early warning when something is wrong.
Keeping a log of your roof’s history is a smart move. Create a folder for receipts, reports, and photos from professional work or your own inspections. This record helps you track performance and provides a valuable history for insurance claims or selling your home. It’s a simple habit that helps you manage your home maintenance as an informed, proactive owner.
Fixing a loose shingle is one thing, but understanding why it came loose in the first place is another. A DIY repair can solve an immediate problem, but it might just be a temporary patch on a much larger issue. This is where a professional inspection makes all the difference. A thorough evaluation is crucial because it moves beyond the obvious symptom to uncover the root cause. Professionals are trained to safely identify the real source of leaks, which often originates far from where the water stain appears inside your home. They know how to assess the entire roofing system, not just one damaged spot, giving you a complete and accurate picture of its condition. This comprehensive view is the foundation for making smart, confident decisions about your home.
A professional inspection is far more than a quick glance from the ground. It’s a systematic check of every component working together to protect your home. A pro will examine your shingles, flashing, vents, and valleys to determine the extent of any damage. Our tech-driven approach takes this a step further by documenting everything with high-resolution imagery. We look for subtle but critical signs of wear, like sagging spots in the decking, rust on metal components, or peeling sealants around penetrations. This detailed assessment ensures nothing is overlooked, from the condition of the underlayment to the integrity of the roof's structure. You get a clear, visual record of your roof’s health, not just a verbal summary.
The goal of an inspection isn’t to sell you a new roof; it’s to give you data so you can make the right decision with confidence. With clear documentation in hand, you can see exactly what the issues are and understand the recommendations without pressure. This data-first approach turns a confusing process into a clear one. Regular maintenance, including having your roof inspected twice a year, helps you prevent major leaks and extend its lifespan by catching small problems early. When you have objective facts, you’re no longer relying on a salesperson’s opinion. You’re in control, equipped with the certainty you need to protect your investment.
How often should I inspect my roof, and what am I looking for? A good habit is to visually inspect your roof from the ground twice a year, ideally in the spring and fall. You are looking for the most obvious signs of trouble, like shingles that are missing, cracked, or curling at the edges. Also, make a point to check your gutters and downspouts for a large amount of sand-like granules, as this indicates your shingles are aging and losing their protective layer.
Is it okay to just use roofing cement on a crack instead of replacing the shingle? Using roofing cement on a minor crack can be a good temporary fix to prevent immediate water entry, especially if you're waiting for a professional. However, it is not a permanent solution. The cement will eventually break down under the Houston sun, and it doesn't address any potential damage to the underlayment beneath the shingle. A full replacement is always the better long-term repair.
My roof is over 15 years old but only has a few damaged shingles. Can I just replace those myself? While you can replace a few shingles on an older roof, it's important to recognize that isolated damage can often be a symptom of a larger, age-related issue. On an older roof, shingles become brittle and the seals weaken system-wide. Fixing one spot might be a temporary patch while other areas are close to failing. A professional inspection can determine if those few bad shingles are a fluke or a sign that the whole roof is nearing the end of its life.
What if I can't find an exact match for my shingles? Finding a perfect match for shingles that have been exposed to the sun for years can be difficult. Your best bet is to take a broken piece with you to a supplier. If you use a shingle that is a slightly different color, it will create a noticeable patch that can affect your home's curb appeal. More importantly, using a shingle of a different brand or style can create a poor fit, which may allow water to get underneath and compromise the repair.
Why is a professional inspection necessary if I can see the damage myself? Seeing a missing shingle is easy, but that shingle might be a symptom of a less obvious problem, like wind damage that has lifted the seals on dozens of surrounding shingles. A professional inspection is designed to assess the health of the entire roofing system, not just one spot. An expert can identify subtle issues, trace a leak back to its true origin, and provide you with clear data so you understand the complete picture before making a decision.
Roofing Resources