Home
Home
Services
Services
Resources
Resources
Storm Restoration
Storm Restoration
Roof Systems
Roof Systems
Locations
Locations
January 4, 2026
Learn how to find and fix leaking roof issues with practical steps for homeowners. Spot common causes and prevent water damage before it starts.
Guides

That sinking feeling you get when you spot a water stain on your ceiling is universal. It immediately triggers a rush of questions: Where is it coming from? How much damage has it done? And how do I stop it? Before you panic, take a breath. Responding to a leak is a process, and having a clear plan can make all the difference. This guide is designed to walk you through that process calmly and logically. We’ll cover the immediate steps you should take to contain the damage, how to trace the water back to its source, and what you need to know to fix a leaking roof for good, so you can move from a moment of stress to a feeling of control.
A water stain on your ceiling is an unwelcome surprise, but most roof leaks don't start with a dramatic drip. They often begin silently, caused by issues that develop over time. Understanding what makes a roof vulnerable is the first step toward preventing a small problem from turning into a major headache. A leak can lead to serious damage inside your home, affecting everything from your attic insulation to your home's structural integrity.
The good news is that many leaks are preventable. They're usually tied to specific points of failure on your roof that can be identified and addressed with regular attention. From the shingles that face the elements every day to the hidden seals around vents and chimneys, each component plays a role in keeping your home dry. Below, we’ll walk through the most common reasons a roof might leak, so you know exactly what to look for.
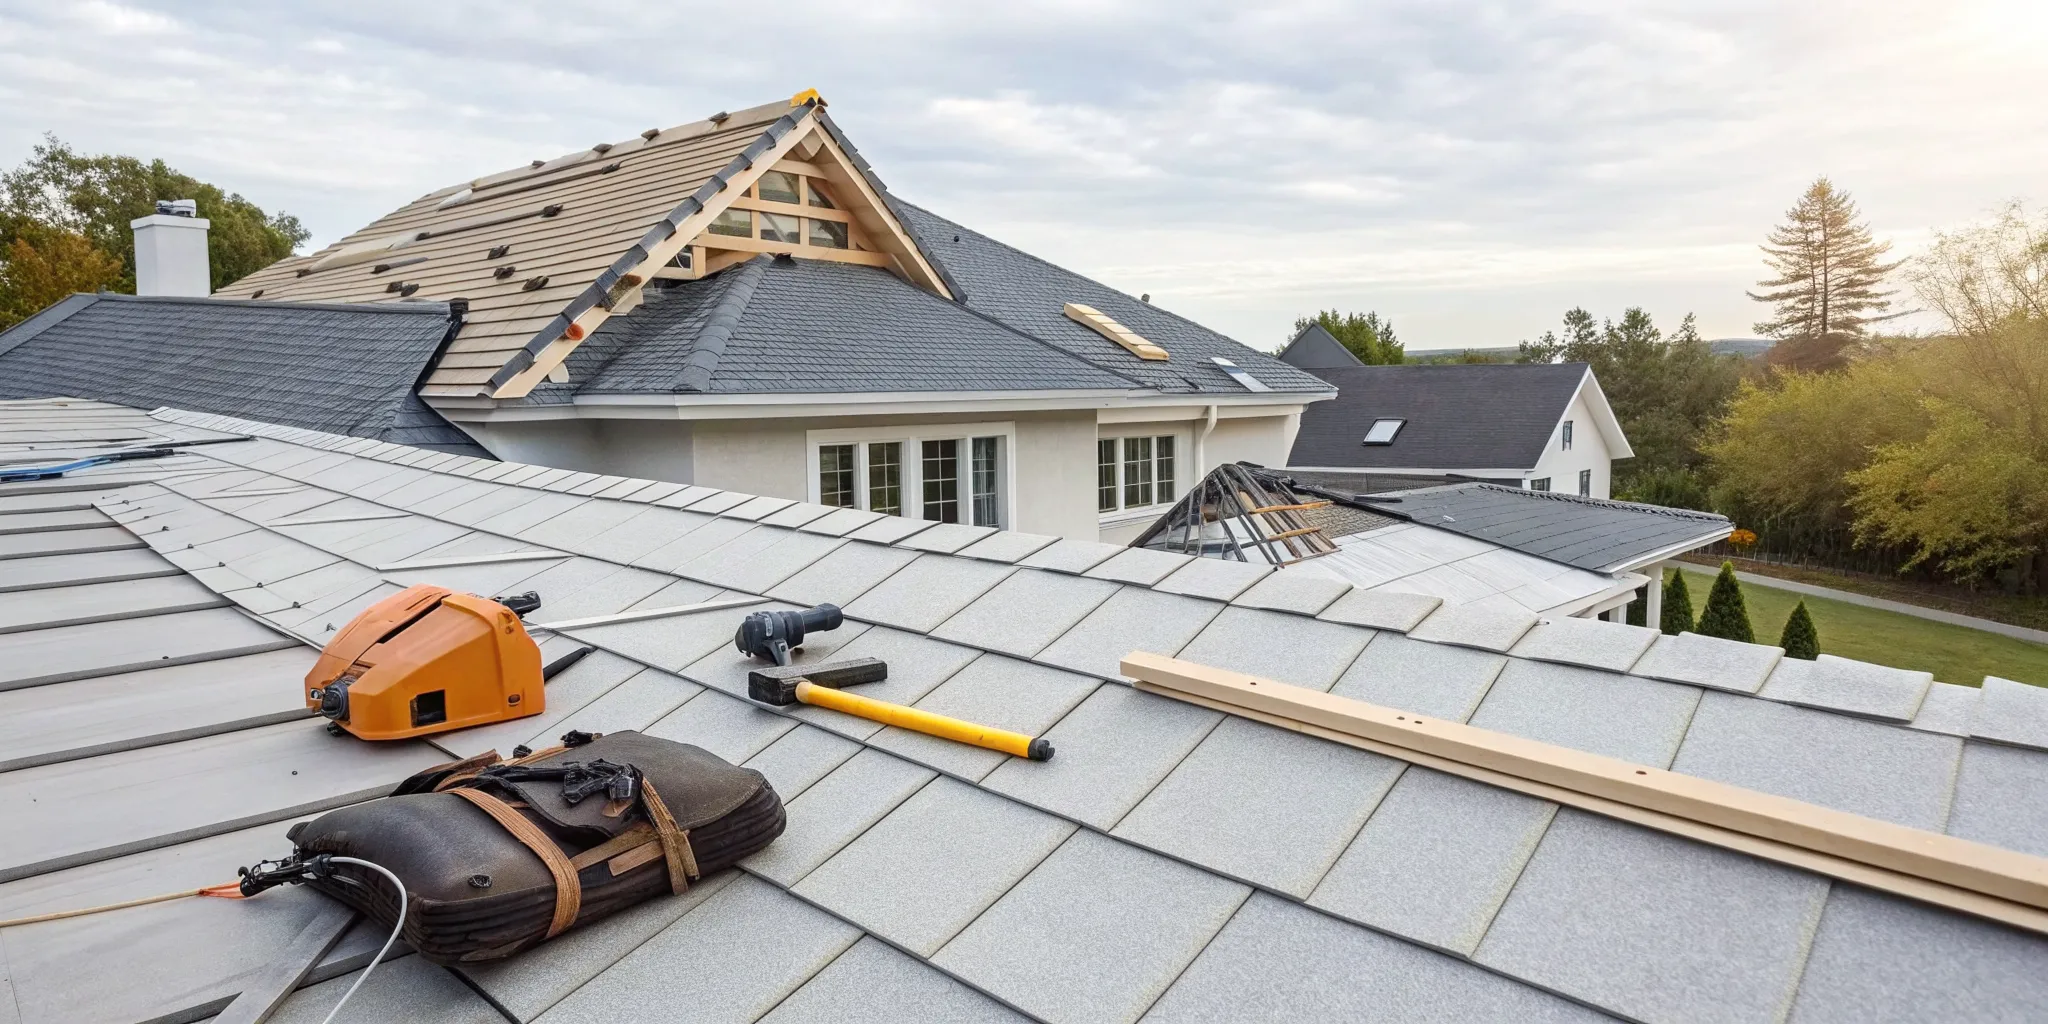
Think of your shingles as your roof's armor. They are the first and most important line of defense against rain, wind, and sun. Here in Houston, intense sun and heavy storms can take a toll, causing shingles to crack, curl at the edges, or even get blown off completely during high winds. When a shingle is missing or compromised, it leaves the protective underlayment exposed to moisture. Water can then seep through, eventually reaching the roof deck and finding its way into your home. Even a single damaged shingle can create an entry point for water, so it's important to address these issues quickly.
Flashing is the thin metal material installed wherever your roof has a joint or an object protruding from it, like a chimney, vent pipe, or skylight. Its job is to create a watertight seal in these vulnerable areas. Over time, this metal can corrode, or the caulk sealing its edges can dry out, crack, and pull away. When the flashing fails, it creates a direct channel for rainwater to get beneath your shingles and into your home's structure. Because these areas interrupt the smooth surface of your roof, they are common sources for leaks that can be tricky to spot without a careful roof inspection.
Your gutters have one critical job: to direct rainwater away from your roof and foundation. When they become clogged with leaves, twigs, and other debris, they can't do their job effectively. Water backs up and pools along the edge of your roof, and this standing water has nowhere to go but under your shingles. Even a perfectly healthy roof can leak if water isn't draining properly. This is why keeping your gutters clean is one of the most effective pieces of preventative maintenance you can do. It ensures water flows freely away from your home, protecting both your roof and your foundation.
Every roof has a finite lifespan. Constant exposure to the elements gradually breaks down roofing materials. The sun's UV rays can cause shingles to become brittle, sealants can lose their flexibility, and granules that protect asphalt shingles can wear away. This aging process is a natural and expected part of homeownership. A leak from an old roof isn't necessarily a sign of a specific failure but rather an indication that the entire system is reaching the end of its effective life. Knowing your roof's age and condition helps you plan for an eventual replacement before wear and tear leads to an emergency leak.
Finding the exact spot where water is getting into your home can feel like a bit of detective work. Water rarely drips straight down; it can travel along roof decking, rafters, and ceiling joists before it finally makes an appearance as a stain on your ceiling. This means the leak’s entry point on your roof might be several feet away from where you see the damage inside. But with a systematic approach, you can trace the water back to its source. The key is to start your search from the inside and work your way out, following the evidence until you pinpoint the problem area. This process helps you understand the scope of the issue before you decide on the best course of action for a repair.
The first clue is almost always that discolored spot on your ceiling or wall. While it marks the end of the water’s journey, it’s the perfect place to begin your investigation. Note the location of the stain, then measure its distance from the nearest exterior wall. This measurement will give you a rough starting point when you head into the attic. If the stain is on an upper floor, the leak is likely directly above it. If it’s on a lower floor, the water could be coming from a plumbing issue or traveling down from the roof through wall cavities. Carefully inspect the area for peeling paint or sagging drywall, as these indicate more significant water damage.
Now, it’s time to head upstairs. Grab a powerful flashlight and safely make your way into the attic. Go to the area directly above the water stain you found inside. Look for evidence of moisture on the underside of the roof decking, the rafters, and the insulation. You might see dark stains, water streaks, or even mold. Insulation can act like a sponge, so feel for any damp or compressed spots. Try to trace the water stains uphill toward the peak of the roof. Water follows gravity, so the entry point will be at the highest point of the visible water trail. This is often the most direct way to find where your roof is failing.
If you can trace the leak to a specific area from the attic, the next step is to inspect the corresponding spot on the outside of your roof. However, your safety comes first. Only get on your roof if it has a low pitch and you are completely comfortable with heights and have the proper safety equipment. If you have any doubts, this is the time to call a professional. If you proceed, look for obvious signs of damage like missing, cracked, or curled shingles. Pay close attention to anything that penetrates the roof, such as vents, pipes, skylights, or chimneys. The flashing around these features is a common failure point.
Sometimes, a leak is so small that it’s difficult to spot with a visual inspection alone. In this case, you can wait for the next rainstorm and head into the attic to listen for the telltale sound of dripping. This can help you zero in on the general area of the leak. If you want to be more proactive, you can simulate a rainstorm with a garden hose. Have a helper stay inside the attic while you spray a small section of the roof with water, starting low and working your way up. Go slowly, soaking one area for several minutes before moving on. Your helper can yell out as soon as they see a drip, pinpointing the exact source of the leak.
Discovering a water stain on your ceiling is a stressful moment for any homeowner. But before you panic, know that taking a few immediate, practical steps can significantly reduce the damage. Your goal right now is to control the situation until you can get a professional assessment. Acting quickly can protect your home’s interior, prevent a small issue from becoming a major headache, and make the final repair process much smoother. Think of this as first aid for your home; these actions are about stabilizing the problem, not performing a permanent fix. Here are the four things you should do as soon as you spot a leak.
Your first priority is to manage the water that’s already inside your home. Grab a bucket, trash can, or any waterproof container and place it directly under the drips to catch the water. If the ceiling is bulging, water may be pooling in the drywall. You can carefully puncture the center of the bulge with a small screwdriver to release the pressure and direct the water into your bucket. This simple step can prevent a larger section of the ceiling from collapsing. Move any furniture, electronics, or rugs out of the affected area. For carpet you can’t move, place thick towels or plastic sheeting down to protect it from water damage.
If the rain has stopped and you feel completely safe getting on your roof, a temporary patch can prevent more water from getting in. Safety is the top priority here; never get on a wet or steep roof, especially during a storm. For small, visible holes or cracks, you can apply roofing cement or a thick, tar-like patch directly to the area for a quick seal. This is not a permanent fix, but it’s a solid temporary measure that can hold until a professional can perform a lasting repair. Think of it as a bandage for your roof, designed to stop the immediate problem until an expert arrives.
Sometimes, the source of a leak isn't a hole in the roof but a simple clog in your gutters. When gutters are packed with leaves and debris, rainwater can’t drain properly. Instead, it backs up and flows underneath your shingles, finding its way into your home. If the weather is clear and you can safely access your gutters with a sturdy ladder, check the area near the leak. Clearing out a blockage might solve the problem entirely. Consistent gutter maintenance is one of the easiest ways to prevent water from pooling on your roof and causing future issues.
Before you move anything or clean up too much, pull out your phone and start documenting. Take clear photos and videos of the leak from inside your home, including the dripping water, stained ceilings or walls, and any damaged belongings. If you can safely access the exterior, take pictures of the suspected problem area on the roof as well. Note the date and time you first noticed the leak. This evidence is incredibly important if you decide to file an insurance claim, as it provides clear proof of the damage and its extent. Detailed records make the claims process much more straightforward.
When you find a leak, the impulse to fix it yourself is understandable. Taking initiative can be empowering, but it’s crucial to recognize the difference between a quick patch and a complex repair. Knowing your limits isn’t just about skill; it’s about safety and ensuring a small problem doesn’t become a major one. Before you pull out the ladder, take a moment to assess the situation honestly. Some tasks are perfect for a handy homeowner, while others carry risks that far outweigh the potential savings. This guide will help you decide when to tackle a repair and when to call for a professional, data-driven assessment.
If you’re comfortable with heights and the weather is clear, there are a few small-scale fixes you can likely manage. For minor issues, like a single cracked shingle or a small hole, you can apply roofing cement for a temporary seal. This can stop water from getting in until a more permanent solution is found.
Another immediate action you can take is damage control. If water is actively dripping inside, placing a tarp over the affected area on your roof can be a great short-term fix. This buys you valuable time to prevent further interior damage while you arrange for a proper inspection. Remember, these are temporary measures, not long-term solutions.
Your personal safety is the most important factor. If you feel even slightly uneasy about getting on your roof, that’s your cue to call a professional. Don’t attempt any repairs if your roof has a steep pitch, is slippery from rain or morning dew, or if it’s windy. No amount of savings is worth the risk of a fall.
Beyond your comfort level, consider your equipment. Do you have a sturdy, properly-sized ladder and the right safety gear? If the answer is no, it’s best to leave the work to someone who does. Professionals are trained to work at heights and have the necessary equipment to do the job safely and correctly. Your well-being should always come first.
Sometimes, a small leak is a symptom of a much larger issue. If you notice a sagging ceiling, large water stains spreading across drywall, or soft, spongy spots when walking on the roof, these are signs of significant water damage that go beyond a simple patch. These issues often point to saturated insulation, rotting roof decking, or even structural problems.
It’s also important to remember that the source of a leak is often tricky to find. Water can travel from the entry point along rafters and decking before it finally drips into your home. What looks like a small leak in your living room could originate from a failing chimney flashing ten feet away. A professional can trace the leak to its true source.
If you’ve tried a DIY patch and the leak returns, it’s time to call in an expert. Recurring leaks are a clear sign that the underlying cause hasn’t been addressed. Repairs involving flashing around chimneys, vents, and skylights are also best left to professionals, as an improper seal in these vulnerable areas can lead to extensive damage. Any job that requires replacing multiple shingles or dealing with underlying rot is beyond the scope of a typical DIY project.
Ultimately, an expert inspection provides more than just a fix; it provides clarity. A professional can identify the root cause, assess the overall health of your roof, and recommend a solution that prevents future issues, giving you confidence that your home is protected.
Once you’ve managed the immediate crisis, the next step is to find a permanent solution. A quick patch might stop the dripping for now, but it won’t address the underlying cause of the leak. A lasting repair protects your home from future water damage, mold, and structural issues. Focusing on a proper fix saves you stress and money over the long term.
Fixing a leak for good involves correctly identifying the weak point and using the right techniques and materials to restore your roof’s integrity. Let’s walk through the most effective long-term solutions, from replacing damaged shingles to understanding when it’s time to call for a professional assessment.
If the leak is caused by a few cracked, curling, or missing shingles, you may be able to handle the replacement yourself. This repair involves more than just swapping out the top layer. You’ll need to carefully remove the damaged shingles and the old roofing paper underneath. From there, inspect the wooden roof deck for water damage. If the wood is soft or rotted, you’ll have to cut out the compromised section and fit a new piece of decking before laying down new waterproofing underlayment and shingles. This ensures the repair is secure from the deck up.
Flashing is the thin metal stripping that directs water away from areas where your roof meets a vertical surface, like a chimney, skylight, or vent pipe. Think of it as the raincoat for the most vulnerable parts of your roof. If the flashing is just slightly loose, you might be able to reseal the edges with roofing cement. However, if the metal is rusted, bent, or has pulled away significantly, a simple reseal won’t last. In these cases, the old flashing needs to be completely removed and replaced to create a durable, watertight seal that can stand up to heavy rain.
Your gutters are your roof’s first line of defense against water damage, but they only work when they’re clear. When gutters get clogged with leaves, twigs, and other debris, rainwater can’t drain properly. Instead, it pools along the edge of your roof, eventually seeping under your shingles and into your home. The fix is straightforward: regularly clean your gutters and ensure downspouts are clear and directing water far away from your foundation. This simple maintenance task is one of the most effective ways to prevent future leaks.
While some minor repairs are manageable, many leaks are symptoms of a larger issue you can’t see from the surface. Water can travel, and a stain on your ceiling might originate from a weak spot far away on the roof. A professional roof inspection provides a clear, comprehensive picture of your roof’s health. An expert can identify underlying problems like inadequate ventilation, widespread moisture in the decking, or systemic flashing failure. Getting a detailed assessment empowers you with the facts, so you can make an informed decision based on data, not guesswork.
The best way to handle a roof leak is to stop it from ever happening. Proactive maintenance not only saves you from the stress of emergency repairs but also protects the long-term value of your home. Instead of reacting to water stains and drips, you can stay ahead of potential problems with a few straightforward habits. Think of it as a simple health and wellness plan for your roof. By focusing on prevention, you can keep your home safe, dry, and secure for years to come, avoiding the costly and disruptive process of fixing extensive water damage. These simple steps give you control and help ensure your roof remains a reliable shield against the elements.
One of the most effective things you can do is to have your roof inspected regularly. Just like a routine check-up, a professional inspection can identify small issues before they turn into major headaches. An expert can spot early signs of wear, subtle damage to shingles, or failing seals that you might not notice from the ground. We recommend seasonal inspections, especially after a major storm, to ensure everything is in good shape. This proactive approach allows you to make small, affordable repairs on your own schedule, rather than being forced into an expensive emergency fix when a leak finally appears. A professional roof inspection provides the clear, data-driven insight you need to make informed decisions.
It’s easy to forget about your gutters, but they play a critical role in protecting your roof. When gutters get clogged with leaves, twigs, and other debris, rainwater can’t drain properly. Instead, it backs up and pools along the edge of your roof, seeping under shingles and into the structure of your home. This standing water is a primary cause of preventable leaks. Make it a habit to clean your gutters at least twice a year, once in the spring and again in the fall. Ensuring water can flow freely away from your roof and foundation is a simple, low-cost task that delivers huge returns in leak prevention.
A healthy roof needs to breathe, and that’s where your attic comes in. Proper attic ventilation helps regulate temperature and moisture levels, preventing the buildup of condensation that can lead to rot, mold, and water damage. In the winter, warm, moist air from your home can get trapped in the attic and condense on the cold underside of the roof deck, eventually causing it to deteriorate. Make sure your attic’s vents are clear and unobstructed. It’s also important that any ductwork, like from a bathroom fan, is properly insulated and vented outside, not into the attic space. Good attic ventilation is a key, yet often overlooked, component of a long-lasting, leak-free roof.
When it’s time for a repair or replacement, the quality of the materials you choose makes a significant difference. While it might be tempting to opt for the cheapest option, investing in durable, high-quality materials can save you money and stress in the long run. Superior shingles, underlayment, and flashing are designed to better withstand harsh weather, from intense sun to heavy rain and wind. These materials are less likely to crack, curl, or degrade over time, significantly reducing the risk of future leaks. Choosing the right roofing materials is an investment in your home’s resilience and your own peace of mind, ensuring your roof provides reliable protection for decades.
Tackling a roof repair, even a small one, requires more than just determination. Using the right tools and materials is the difference between a temporary patch and a lasting solution. If you’re comfortable with heights and have some DIY experience, you might be able to handle a minor issue yourself. But even if you plan to hire a professional, understanding the essentials helps you ask the right questions and ensure the job is done correctly. A quality repair depends on quality supplies, whether they come from your garage or a contractor’s truck.
Your goal is to fix the problem without creating a new one. That means using tools that won’t damage surrounding shingles and choosing materials designed to withstand Houston’s specific climate challenges, from intense UV rays to torrential downpours. Think of it this way: the materials are just as important as the technique. A shoddy sealant will fail under the summer sun, and the wrong type of shingle can leave your roof looking mismatched and vulnerable. Getting familiar with the basics empowers you to make a confident, informed decision about how to proceed with your repair, ensuring your home remains protected.
For a simple fix, like replacing a few missing or cracked shingles, you don’t need a truck full of equipment. However, you do need a few key items to do the job safely and effectively. Before you even think about the repair, make sure you have the right safety gear, including sturdy, non-slip shoes, gloves, and a properly secured ladder. Many homeowners also find a safety harness provides essential peace of mind.
Once your safety is covered, your basic toolkit should include:
With these items, you can often tackle minor shingle replacement yourself, provided the underlying wood is still in good shape.
When you’re at the hardware store, it’s easy to get overwhelmed by the options. For shingle replacement, the most important step is to find a match for your existing roof. Bring a piece of a damaged shingle with you to get the color and style right. An exact match ensures your repair is practically invisible and maintains your home’s curb appeal.
Beyond the shingles, focus on quality sealants. Look for a tube of asphalt roofing cement or a high-grade polyurethane sealant. These are designed to create a durable, waterproof bond that remains flexible, preventing cracks as temperatures change. This is especially important for sealing around flashing, vents, and nail heads. Skimping on sealant is a common mistake that often leads to the leak returning within a year.
If you feel uneasy on a ladder or the damage seems widespread, it’s time to call a professional. Roofers not only have the training and safety equipment for complex jobs, but they also have access to professional-grade materials that offer superior performance and longevity. These products often aren't available at your local home improvement store.
Professional-grade materials can include thicker synthetic underlayment, specialized flashing systems, and sealants formulated for commercial applications. A reputable contractor will also know exactly which products meet local building codes and are best suited for our region’s weather. While a DIY fix can solve a small problem, a qualified roofing professional ensures the repair is integrated seamlessly with your entire roofing system, protecting your investment for years to come.
How often should I have my roof inspected? A good rule of thumb is to have your roof professionally inspected once a year. Think of it as a routine check-up for one of your home's most important systems. An annual inspection helps catch subtle signs of wear and tear before they become leaks. It's also smart to schedule an inspection after any major weather event, like a hailstorm or hurricane, just to be sure no hidden damage was done.
Is a small water stain on my ceiling a sign of a major problem? That small stain is an important warning sign. While the source could be a minor issue, the stain itself means water has already penetrated multiple layers of your home's structure, including the roof deck and insulation. Ignoring it allows moisture to spread, which can lead to wood rot, mold, and more significant damage. It's always best to investigate the cause, even if the spot seems insignificant.
My roof is only a few years old. Why would it be leaking already? It's definitely frustrating when a newer roof has problems, but age is only one factor in a roof's health. Leaks on younger roofs are often caused by specific events or vulnerabilities. This can include damage from a recent storm that lifted a shingle, failing sealant around a vent pipe or chimney, or even an issue related to the original installation. A leak doesn't automatically mean your whole roof is failing.
If I can't see any damage from the ground, is it safe to assume my roof is fine? Unfortunately, many of the most common causes of leaks are impossible to spot from your yard. Issues like cracked flashing, worn-out seals around pipes, or damage to shingles on the back side of your house are only visible up close. A thorough inspection is the only way to confirm your roof is in good condition and to catch those hidden problems before they lead to a leak.
What's the biggest mistake homeowners make when dealing with a leak? The most common mistake is focusing only on the interior water stain instead of finding the true source of the leak on the roof. Water can travel a long way from where it enters before it shows up on your ceiling, so patching the wrong spot won't solve the problem. The second biggest mistake is waiting too long to act, which gives a small issue time to become a much more complex and costly repair.
Roofing Resources